In this blog, we will walk you through the steps and considerations you need to have before you dive in and get your first studio monitor. This blog is part of a series created by our Senior Editor Michael Jameson. So far we have looked at the essential kit you will need to start making your own music. We've covered picking the right computer and how to chose the perfect headphones. Now we will do our best to help you find the studio monitor that meets your needs and your budget and you get you another step closer to completing your kit!
There are four main considerations:
1. What's your budget?
2. Do you want a near field or a far field?
3. Should you go for passive or active studio monitors?
and finally, after you've got them...
4. Where should you place your speaker to maximize its effect?
First things first, what is it exactly?
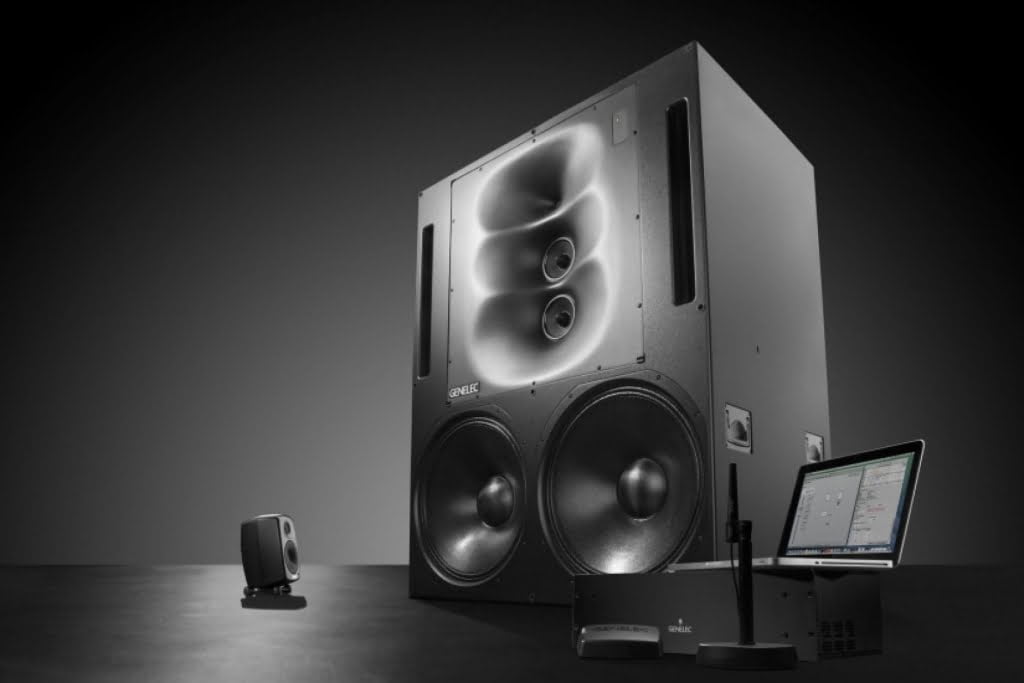
What is a Studio Monitor? No, it’s not the thing you stare at all day (Unless you have one of these… see below, in which case we wouldn’t blame you…).
Studio Monitors are the conduit through which you listen to and mix your epic masterpieces. They are like choosing a new pair of ears. Quite important then eh?
Whether you are recording, mixing, or mastering, your monitors are your primary and most important point of reference.
Genelec SAM™ Master Studio Monitors
What you're looking for in Studio Monitor
Good studio monitors should let you hear exactly what’s been recorded. In other words, monitors need to demonstrate a relatively flat frequency curve, instead of boosting certain frequencies to make music sound more pleasing to the ear.
They should also be rugged enough to withstand the demands of the project studio—providing an accurate, uncolored response at a wide range of volume levels.
Here are some basics you’ll need in order to get started on your quest to find your new ears.
Event 20/20BAS Studio Monitor
Budgets to suit everyone!
Well, they come in all shapes and sizes. Literally…
Thankfully, you don’t need to spend £10,000 per speaker. Good monitors such as the KRK Rokit RP5 G3’s can be picked up for as little £140 each.. although we'd recommend going for the slightly larger RP6’s as they don’t cost much more.
For something a little higher up the ladder, these Event 20/20BAS Monitors are very good.
They’ll cost you a bit more - not much past the £200 mark per speaker, but they’ll definitely be worth the extra investment. These are a reissue of an old classic, the Event 20/20BAS is based on the original Event 20/20bas released back in 1995.
According to the Event website - “The very first pair of 20/20bas speakers were used by Francis Buckley to mix Quincy Jones’ Q’s Jook Joint album for which he won the 1996 Grammy Award for Best Engineered Album.” - so they work well then.
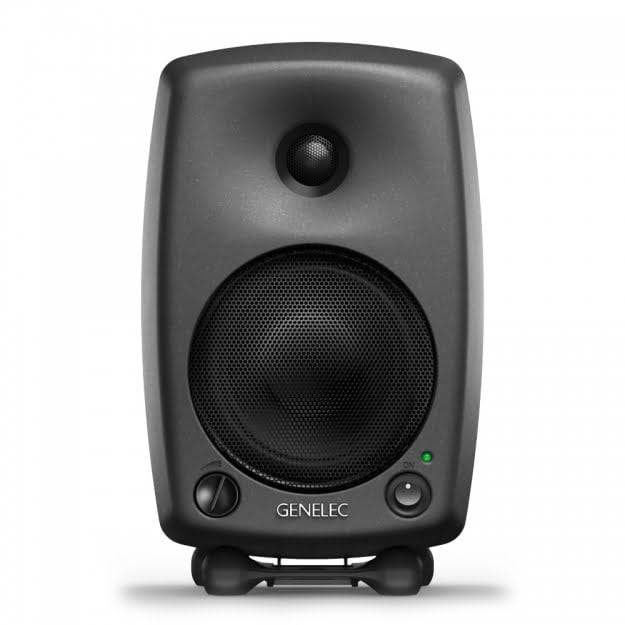
For the home studio, the next and probably highest step I’d go to for near field monitors would be to around the £500 mark per speaker. A fantastic example in this bracket would be the Genelec 8030BPM. Costing almost exactly £500 per monitor, you’ll be very pushed to find a better near-field monitor in my opinion. Generic is well known for high-end studio monitors and these certainly don’t disappoint.
Genelec 8030BPM Studio Monitor
If you’re feeling extra flush, you could match them with a Genelec subwoofer to get those extra lows… Either the 7060BPM or the older 7050B would be ideal here.
Near Field vs Far Field
What the difference? Well, far-field monitors are designed to be more than 6 feet away from the listener. These are what you’ll find in larger acoustically treated studios. So not for us then eh!
Near-field are where we want to be. Meant for listening within 6 feet, these are the mainstay of home studios - Simples?
Passive vs Active
Ultimately we want Active speakers here. Passive monitors are powered externally and generally require more grief setting up. With cabling, choosing the right Amp (with the right power) and speakers to match, you are better going down the Active route as they have built-in, matched amplifiers.
Speaker placement
This is key. Every room will sound different.
For this most important section, we turned to Avid (the people behind Pro Tools and M-Audio) to get their thoughts on Studio Monitor placement.
“Strategic monitor placement is one of the most important factors in getting your sound right—and it’s simpler than you might think. Proper placement means choosing the best possible arrangement for your desk, speakers, and other studio equipment." - Avid
Image by Avid
When it comes to monitor placement, you’ve probably heard a lot of talk about the “sweet spot.” This refers to sitting in the middle position between the two speakers, where the stereo image is optimised.
The sweet spot lets you hear a true representation of the music so you can make accurate judgments while recording and mixing.
When positioning your monitors, observe the following guidelines to maximise the sweet spot and enjoy better performance from your monitoring setup.
Image by Avid
Align your speakers in an equilateral triangle from the listening position
When mixing, it’s important to sit as close as possible to the centre of the sweet spot. Select a comfortable seating position and angle each monitor to accurately face that position. The “toe-in” angle of each speaker should be carefully arranged in an equilateral triangle to the listener.
Place monitors symmetrically within the room
Try to achieve symmetry in the room when setting up monitors. For example, if the left speaker is three feet from the back wall and four feet from the sidewall, place the right speaker the same way (if possible) in order to give each speaker a similar acoustic environment.
By entering the listening position along a wall, your system will maintain better low-frequency clarity. In a rectangular room, the best sound can be obtained by orienting the console and loudspeakers into the room’s long dimension. This gives the low-frequency waves enough time to develop before hitting the rear wall (see figure 1).
Distance from the back wall should be different than distance from sidewall
It’s always better to place the monitor a different distance from the back wall than from the sidewall. In other words, if your monitors are two feet from the back wall, make sure they’re not also two feet from the side walls.
When positioning your monitors, observe the following guidelines to maximise the sweet spot and enjoy better performance from your monitoring setup.
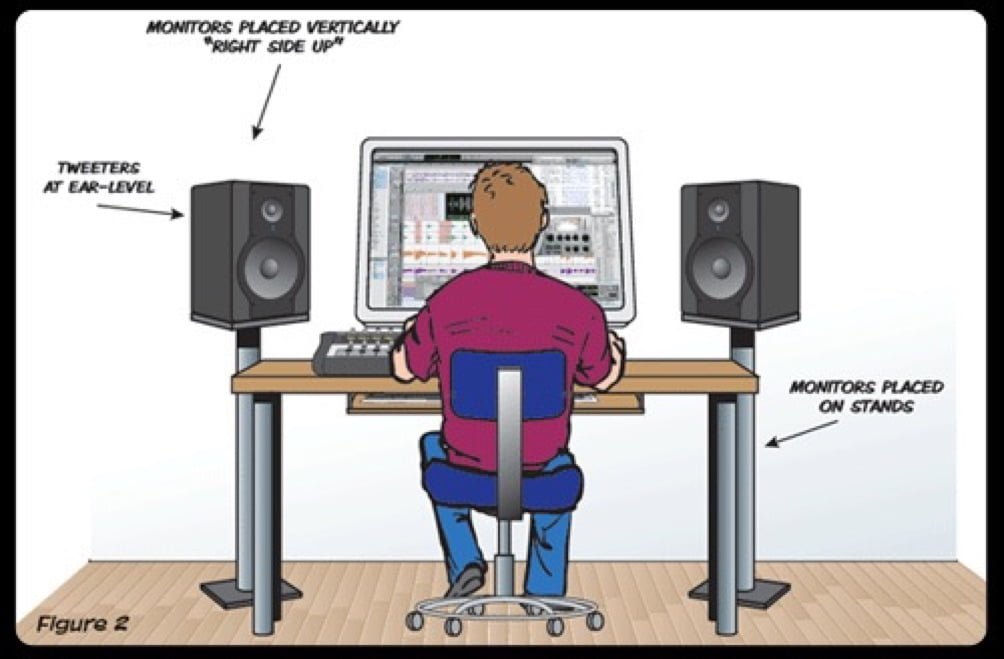
Image by Avid
Place monitors vertically (or “right-side” up)
Although it may be tempting to place your monitors on their sides, this can significantly degrade the stereo image. Place the monitors vertically to get the best stereo representation (see figure 2).
Use monitor stands whenever possible
When you place speakers on a mixing console or desk, sound waves bounce off the flat surface before reaching your ears—degrading the tonal balance, clarity and image localisation. Placing monitors on stands will prevent early reflections from interfering with your mix. (However, if this isn’t practical, it’s generally acceptable to carefully position your speakers on the desk or mixing surface.)
Tweeters should be at ear level
It’s important to place the monitors so the tweeters are at the same height as your ears (see figure 2).
Avoid placing monitors in corners
This helps prevent bass buildups that occur naturally at boundary and corner locations.
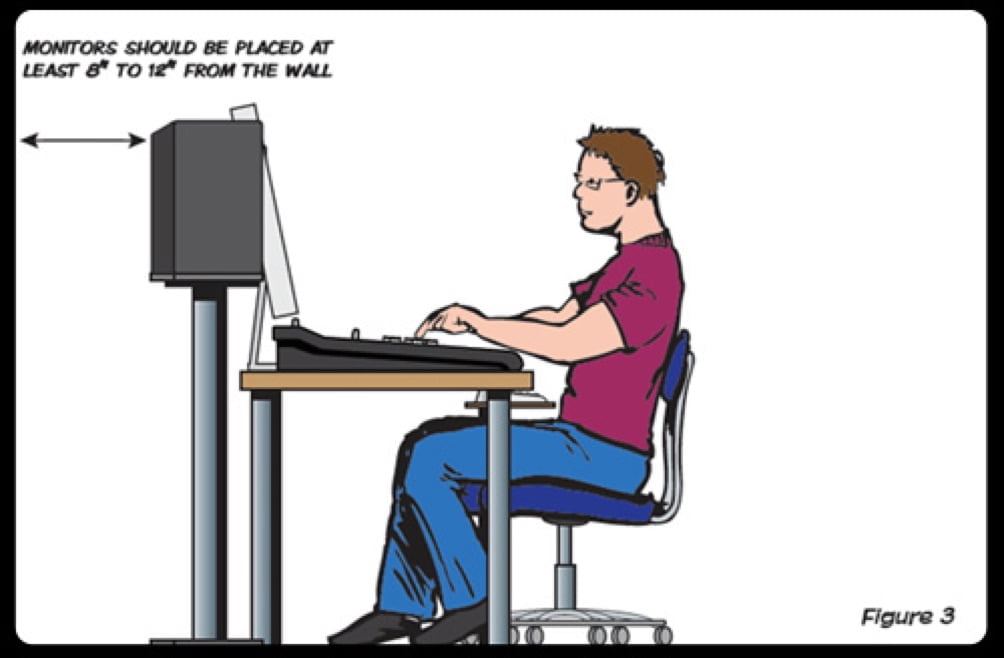
Place monitors at least 8-12” from the wall
This prevents sound waves from bouncing off the wall and reflecting back towards you (see figure 3). When using monitors that contain bass reflex ports, make sure there is enough space to prevent airflow obstructions.
Whether you’re a seasoned pro or just starting out, monitors are an important part of your studio setup and can make or break the quality of your mixes.
If you enjoyed this blog don’t forget to follow us on Twitter, Facebook, and Instagram for your daily dose of media, music, production & drone chat!
Visit our website lamedia.co.uk and if you have any questions, e-mail us at [email protected] or give us a call on 0131 622 0220
Hearing is believing, especially when it comes to headphones! Every good studio needs at least two pairs of headphones, especially if you are planning to record and mix music. There are so many alluring headphones out there we thought we’d share this blog on buying the right pair for your musical setup.
Good brands like Bose can seem like a sound investment, yes they will make your music sound epic but it won’t be accurate. Say you picked up a pair of Dre Beats (god forbid) they may give your tune a ton of juicy base but it won’t be accurate.
Why go pro?
For making music you need a proper pair of professional headphones that will almost flatten your melody out. You want your pro headphones to make your music sound natural and as close to your ear as possible. You don't need to blow your budget to get it right. Obviously, you can if you are a budding audiophile but there is a danger cos the sky really is the limit when it comes to blowing money on headphones, just Google Sennheiser Orpheus HE 1. Enough said.
So, If you’re not Bill Gates or don’t have a Lambo parked in your underground car park below your house in Knightsbridge, then here are a few considerations for your choice of headphones. This is not a de facto ‘you must go and buy these now’ review of the top 10 headphones in the world etc… we’ve got options for different budgets.
What could possibly go wrong?
Well, if when mixing a tune your headphones aren’t up to snuff, you run the risk of assuming you have more base than you actually do or possibly missing the mid-range clarity. This means you will compensate when you don't need to and you'd have no way of knowing if it sounds right. Chances are your track would be very badly mixed.
As we mentioned you need two pairs of headphones. Recording Studios use two specific types of Headphones for two very different purposes.
What's the difference between open & closed-back headphones?
The main purpose of these types of headphones is recording.
Closed-back headphones provide good sound isolation and little or no sound bleeding out into your microphone. Some musicians recommend different cans depending on their instrument of choice. For example, A drummer once told us that Beyerdynamic’s DT 100/150 kept falling off as they’re quite heavy, so he favoured a lighter closed-back set of cans. Our in-house composer Mike uses the DT 150’s for recording… but then again he isn’t leaping around behind a drum kit too often, maybe after a few whiskies on a Friday night for our amusement.

Sennheiser HD280pro
Open Back Headphones are mainly used for mixing in the studio and by Audiophiles (sound geeks). Ideally one should use a good set of external Monitors from companies such as KRK and Genelec. However, in many cases, it’s not an option, especially in ‘volume sensitive’ home studios with angry neighbors and also most people probably don’t want to have to treat their bedroom or sitting room with acoustic foam.
Open Back can give you a much more natural and realistic sound but very little in the way of sound isolation. Personally, we think a good set of Open Studio Monitors are a wonderful thing to behold. Being able to hear every detail of your mix in ultimate clarity is something every musician needs to have in their life.
Closed-back headphone suggestions
Sennheiser HD280pro - Around £100 - Good, solid sound.
Beyerdynamic DT150 - Around £115 - Based on the Industry-standard DT 100’s of old. If you’ve been in any recording studio, chances are you’ve seen a set of these.
Beyerdynamic DT770 Pro - Around the £100 mark or cheaper. Lighter and more comfortable than the above. But not as bulletproof. In my opinion, unless your a drummer, go for the DT 150s.
Sure SRH 1540 - Around £400 - Shure are well known for top-quality headphones. These certainly don’t disappoint. A higher price tag that’s definitely worth it and easily the most comfortable and best sounding closed headphones on this list.
Open back headphone suggestions
Beyerdynamic DT990 Pro - Around £100 - Good performance for a good price.
Sennheiser HD 650 - Price varies but should be able to get a pair for under £300 nowadays. These have been around for over a decade for one simple reason. They’re good. Very good. Thousands of people swear by these, Audiophiles and professionals alike. Our editor also has a pair of these beauties and paired with a decent headphone amp and DAC, says they are fantastic.
Shure SRH 1840 - Around £400. Similar to the above HD 650s in sound quality. In our opinion, these are a bit ‘bass light’ and don’t quite have the sound stage of the Sennheiser’s. They are also more expensive… The opinion is divided with these ones. Our advice would be to go and listen to some in-store and make your own decision.

Shure SRH 1840
Sennheiser HD 800 - £1000 - Yup, that’s right. A thousand pounds for these guys! Are they worth it? Well, we’re now really in to the realm of diminishing returns here. Yes, these cans are very very good indeed. Are they 3 times better than the Shure’s or HD 650s? We don't think so.
In our next blog we will deal with external Monitor as part of our series on How to Make Music: The Vital Tools You'll Need. If you made this far enjoy the picture below of the dream headphones you could only buy realistically if you were a millionaire. Nobody needs a marble case but it would be nice, right?

Sennheiser Orpheus HE 1
We hope you’ve found this blog helpful! Let us know what you think in the comments, tell us if we’ve missed something out. If you enjoyed this blog don’t forget to follow us on: Twitter, Facebook, and Instagram for your daily dose of media, music, production & drone chat!
Visit our website lamedia.co.uk and if you have any questions, e-mail us at [email protected] or give us a call on 0131 622 0220
Before joining the team, our Senior Editor Michael Jameson started his career as a musician and composer.
Now here at LA Media, he gets to combine his love of music with his passion for all things techy. For more than 10 years now Mike has been creating amazing and original bespoke soundtracks for many of our clients.
We understand the importance of good music. So, with Mike's help, we've put together an essential tool kit list to help get you started on your musical journey.
Let's get digital, digital!
With new technology, you don't need to be a child prodigy to be a good composer. You don’t even have to psychically have an instrument to make music. You don’t need a band, a singer or even someone who can read music. Sure, the above helps, but it’s not essential.
Thanks to technology, music is more accessible than ever. You can, in fact, make beautiful music on your computer! In this series of blogs, we look at what equipment you will need to start making your own professional music.
Ask yourself the right questions
In this first installment, we will cover some essential questions for musicians who want to go digital.
Should I go Mac or PC?
What kind of processor do I need?
How big should my hard drive be?
What is a DAW and which one should I get?
Getting the right Computer
The first bit of kit will be the backbone of your studio - the computer. Now, the type of computer required will vary depending on your usage. For the DJ who's constantly on the move, there’s the obvious choice of a laptop. For something more static there’s a desktop solution.
Unfortunately, that’s not it… The next big question is whether to go Mac or PC. Some have very ‘particular’ views on this topic! In the end, it depends on what you are used to. Personally, we prefer Macs. In our youth, we were PC geeks but were converted when OS X was released.
This opinion might be controversial but in our opinion Macs are more stable, less susceptible to viruses, etc., and easier to work with and set up. But that is just our preference and you can still make great music with a PC.
Mac options
Computers to pick from MacBook Pro, iMac, and Mac Pro.
Personally, we would stay away from the ‘new’ Mac Pro. It hasn't been touched since 2013 and costs a fortune. For the DJs out there, the obvious choice is the MacBook Pro.

MacBook Pro
The new MacBook is not powerful enough as a competitive tool for production. That leaves the iMac for the Studio setup. Not ideal I know, but the new iMacs are pretty powerful if you spec them up on the CPU side, as they have the 6th Gen Intel Core i7 6700K CPU in them.

MacPro
Per core, they are nearly twice as powerful as the 2013 12-core Mac Pro’s Xeon CPU cores. With 4 of those cores that are hyper-threaded, you are essentially getting an 8-core machine. More than enough for most needs AND of course, you get that glorious 27 inches 5K screen.

iMac
PC options
Well… where to start… we aren’t going to describe the ‘perfect system’ here as there are so many different custom systems out there it would take forever. Here are, however, a couple of very good builders of systems depending on your needs!
The machine you’ll need will obviously depend on what you’re going to use it for. A general steer would be to get as high a spec’d processor as you can afford.
For workstations, Xeon CPUs are the mainstay. They tend to be a generation or so behind the latest consumer chips, but they are in general more reliable and have a much higher core count. Unfortunately, there is a caveat… they’re not cheap!
Some would argue that multi-socket Xeon machines are overkill for a home studio. Well, again it would depend on your usage. If you’re constantly running large sessions with high-quality virtual instruments, such as Orchestral VI’s, then you’ll benefit from all those cores. If you’re recording audio and not reliant on CPU-sucking virtual instruments, then a Quad-core Core i7 would do the job well.
Recommendations - CPU:High-end workstation - Dual Intel Xeon E5-2687W v4 12 Core (24 cores total with HT @ 3.00 GHz)
Consumer chip - Either the i7 7700K Quad Core or if you can afford it the i7 6950X Ten Core (a lot more pennies required here!!) Per core, the 7700K is faster, it’s just that the 6950X has ten of them…
How much RAM and Hard Drive space does a musician need?
I’d go for at least 32GB of good quality RAM. More if you can afford it! In terms of Hard Drive try to go for a decent-sized SSD here or if you can, get an M.2 module such as the Samsung 950 Pro 512GB M.2 SSD for blisteringly fast reads and writes.
Although not essential for a composer we will cover graphics. Let’s face it you may want to game on this computer too or need the system to be able to cope with post-production, then something quite beefy would be sensible.
Ultimate option - Nvidia Geforce GTX 1080 8GB (Nearly as fast as the GTX Titan and A LOT cheaper!)
Mid-range - Nvidia Geforce GTX 1060 6GB
Low-end - Nvidia Geforce GTX 950 2GB

Nvidia Geforce GTX 1080 8GB
DAW - Digital Audio Workstation Application
DAW is the software you will use to create your music. This is your canvas and orchestra, which can unleash your genius. Not all DAWs are created equal and trying to figure out which one is best can be difficult.
Like the MAC or PC question, everyone has an opinion on which is king. So, with that said, we use Pro Tools and always have! It’s just what we prefer.
That doesn’t mean you must agree with us! So here are some other options.
Logic Pro
There are literally tons of loops, samplers, instruments, and basically it sports everything you need to go from scratching up ideas for a song to finishing the master mix. It’s also affordable when compared with most major DAWs. Only downside? It works exclusively on the Mac.

Logic Pro
Steinberg Cubase
German-made DAW software. Cubase has a steeper learning curve with its sophisticated interface that takes some time to get used to. The samplers included do not give you the best sounding instruments on the market, but they are usable. I find myself digging into 3rd party VSTs like Native Instruments Komplete (which is excellent) when on Cubase though. The thing I really like about Cubase was its stability. Close to no unexpected crashes when producing on Cubase. Cubase also works on the PC and MAC, so collaboration would be a breeze.
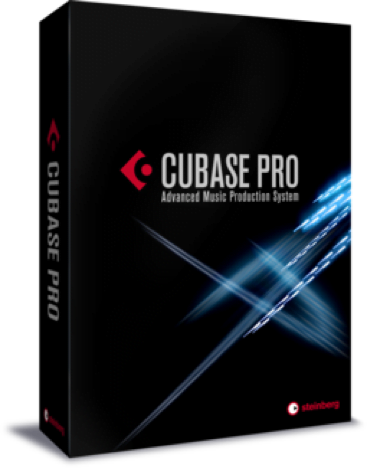
Steinberg Cubase
Ableton Live
Ableton Live is the must-go DAW software for electronic producers. The workflow on Ableton is different from the other DAWs. You can work really fast, creating lots of tweaks on your audio and tracks. If you are into electronic music, Ableton Live is a software you need to at least try. Ableton Live lacks a score editor, though.
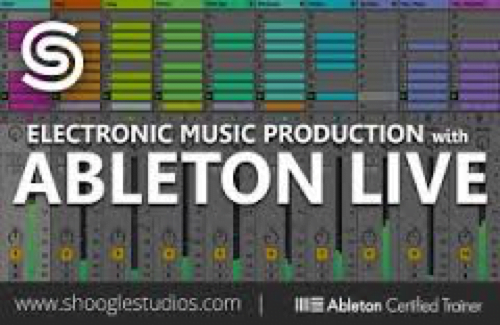
Ableton Live
PreSonus Studio One
Studio One was said to be the easiest DAW to use because the DAW is based on a drag-and-drop structure. Everything from instruments, audio tracks, and effects can be dragged and dropped into the arranger window. Studio One was made to be the least technical among the major DAWs so you only focus on the music and not the technical parts of using a DAW. I somehow find Studio One limited in terms of effects, functionality, and features. For example, it lacks surround mixing and score editors. If you can live without having an integrated score editor and want something straightforward/easy, take Studio One for a spin.
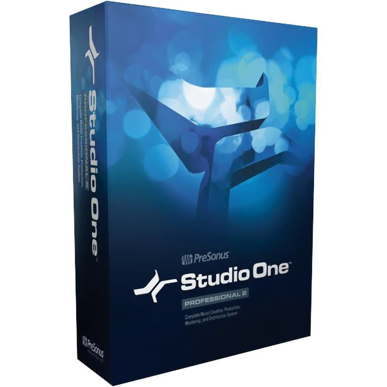
PreSonus Studio One
Pro Tools
Pro Tools recently launched its new subscription-based plan where you can subscribe to use Pro Tools for only £24.99 a month. Known as the industry standard, most professional studios would be using Pro Tools, so if you’re thinking of joining the pro level, starting off with the lighter version of Pro Tools isn’t a bad idea at all. It used to be the case that Pro Tools only worked with its dedicated hardware - MBox, Digi 003, etc… and the various Pro Tools HD setups. Thankfully that has now changed and it will work with any 3rd party hardware. We personally like the uncluttered appearance of the software. The tools are laid out in an easy-to-understand way. Again, just our opinion! Also, it works on both Mac and PC.
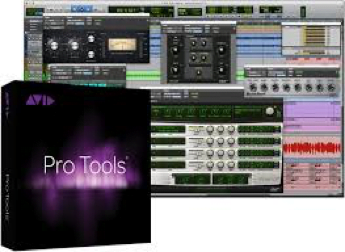
Pro Tools
Anyway! That’s enough for now. Next, we’ll be dealing with picking the perfect Headphones.
We hope you’ve found this blog helpful! If you enjoyed this blog don’t forget to follow us on: Twitter, Facebook, and Instagram for your daily dose of media, music, production & drone chat!
Visit our website lamedia.co.uk and if you have any questions, e-mail us at [email protected] or give us a call on 0131 622 0220

