So, how do you get started on a career in television? Once upon a time, you would have been told "fingers crossed, it's a lucky dip, keep applying and good luck because television work is exclusive and at the very minimum you need to know someone on the inside just to get you an introductory meeting."
The good news is things have changed dramatically and are a lot easier now.
Broadcasters and production companies all have websites and job opportunities are posted online. They tell you how to apply, the qualifications you need and how much you will get paid. All you have to do is fill in the form and wait for response alongside thousands of others.

Almost every day LA Media meets bright young people who want a career in television and based on our 45 years of experience in television production we tell them what we think. It's not ‘typical advice’ but it has worked for many. So if you want to find out what we tell them, then this is for you.
Don't put your future in the hands of others
You could always join the ‘work lottery’ by simply applying for jobs and waiting for replies. However, this can be very demoralizing, especially when your excitement is met with silence.
You need to understand that you are in charge of your future and no one else is to blame if you allow your time to slip away.

Never catch yourself doing nothing
1. Use your time pro-actively by checking out what the production companies like the BBC and independents are making.
2. Consider what you watch on television in an analytical way. Work out what you like and don't like and then understand why - this will help you gain a clearer picture of the creative path you should be following.
3. Visit production websites and get to know what they make, what they have made in the past, discover the names of the people that lead these companies, and reach out to them through the website. Ask them for a quick meeting or a short chat. Before you do, make sure you know what you want to talk about. It really helps!

4. Cameras, lenses, audio gear, lighting and editing are all areas you should study up on while you are waiting for meetings to happen. YouTube has info on anything you can think of and you should use it to increase your technical knowledge. Most importantly don't just watch one - watch hundreds and very soon you will learn to ‘talk the talk’.
5. Help yourself by building up a bigger and more informed picture of the industry you want to work in. This knowledge will let others know that you are serious about a career in television and that always goes over well when you are in conversation with people who could give you work.
What are you working on?
1. Time to spare - you shouldn't have any! If you do then use it to make your own films. Most mobile phones have a video option and there is also free editing software available online. All you need is an idea to start making your own films.

Filming your own ideas is also a great way to simply get better. You will prove to yourself what you already know and at the same time highlight areas you need to find out more about. It also provides a talking point for when you meet others in the industry as most conversations with them will start with the question - so what are you working on?
2. What's your idea? This is the fun part and yet for a lot of people, it's also the most challenging. Whether it’s a good idea or a bad idea is irrelevant, it just has to be an idea that will get you motivated to get up and get out filming.
3. Collaborate with others - it can be very lonely out there, so we would always encourage you to get some friends involved with any project you are doing. Discuss your ideas with them and even use them as your presenters, crew, or actors when required. Get onto your social media outlets and ask other passionate filmmakers to join you on your project. You’ll meet new people and get new perspectives.
4. Publish - let people see what you are making and what you can do. Don’t judge your films to the point where you do nothing with them because in your eyes they are not perfect. Be brave, put them out there on social media channels, and take the feedback. You can decide what comments you listen to and ignore the inevitable trolls that will surface.

As ever, if you have any more questions about starting a career in television or would like to learn a bit more about what we do here at LA Media, just get in touch via email at [email protected] or through the contact page on the website.
In this blog we let our self-professed tech geek/ Mac guru/ computer enthusiast/ Senior Editor Michael Jameson guide you through his ideal specs for building the ultimate computer.
Mike is a bonafide computer aficionado he's been responsible for overseeing the building and expansion of LA Media's production edit suite. So what we're trying to say is he knows his stuff you can trust this man's opinion when it comes to computers!
Not only does he research this stuff as a hobby and read every issue of Mac User religiously, but he lives and breathes processors, memory storage space and video cards. Nobody at LA Media buys any sort of tech device without first consulting Mike.
Mike has graciously decided to share with us insights on how to build your own computer. Mike proves you can build a kick-ass machine that can be used for both editing and gaming (well, let's face it you can't work 24/7, after all...all work and no play makes Jack a dull boy!).
An introduction to How to Build the MOST powerful computer
Well… where to start...
Mac or PC?
Well, this is a very straightforward answer… Except for some limited build to order options on the Apple Website, you can't truly build your own Mac (Unless you want a Hackintosh - which I won’t go into!).
So PC it is… Let’s make this a money-no-object exercise. Fun!
First Things First, the Case
What are you looking for here? Looks? Size? Maybe you fancy some practicality?
Personally, I’d go for a bit of both. Make sure it’s big enough to fit everything you want, but not so big that you have 8 empty PIC-E slots for no good reason!
My favourite case for a Core i7 build is the Mid-Tower Corsair Crystal Series 570|X RGB. It really is a thing of beauty and also very practical. See below...*Homer Simpson drools*

Mid-Tower Corsair Crystal Series 570|X RGB
But in our ‘case’ we’re wanting a workstation/gaming monstrosity. So we shall look no further than the Corsair Obsidian 900D.

For the Motherboard!
Here there are a few options to start with. What CPU will you be stuffing in this powerhouse? Will you be using a monstrous Intel Xeon with 22 cores? Maybe two of them? A Core i7 6950X? The new Kaby Lake 7700K overclocked to 5GHz perhaps?! you might want to try out AMD’s new Ryzen CPU…
Ok.. so we want to build a workstation powerhouse that can also fly through the latest games at the highest resolutions.

So for us, we’re going down the Intel Xeon route. Plus being a Xeon it should last forever. The Asus Z10PE-D8 WS has everything we need here. See these stats below:
Quad Strength Graphic Power – 4-Way PCI-E Gen3 x16 link supporting NVidia GeForce SLI and AMD CrossFireX on demand
Supreme Power Solution – Premium components deliver industry-leading power efficiency
Unique BIOS for Dual CPU O.C. – Boost CPU’s overclocking performance up to 10%
Superb storage flexibility– onboard M.2 x4 and support for ASUS PIKE II cards
Easy maintenance–ASUS Q-Code Logger, an easy-maintenance button and Dr Power LED displays unusual power statuses
Let's Talk about CPU
Well, with the new Intel Xeon v4 Broadwell chips out now, the max core count has increased to 22. So with two of those you get 44 cores and 88 including hyperthreading. Wow! The only downside of this high core count (other than the £4,200 price tag) is the lower clock speed. 2.2GHz to be precise with the Intel Xeon E5-2699 v4.

The other option would be the 12-core Intel Xeon E5-2687W v4. Running at 3GHz you get higher single-core performance. With this in mind we’ll opt for this beauty as it will help with any gaming we’ll be doing!
Games typically only really benefit from 4 cores, so the higher we can get the frequency per core the better in our case.
As a side note - If it’s a pure gaming rig you’re after, then you’d be best getting a new Kaby Lake core i7 7700K and overclocking it to 5GHz. And rather amazingly, the whole system is around the price of one of our Xeon CPU’s. Crazy no?
The Perfect Cooling System for the Ultimate Machine
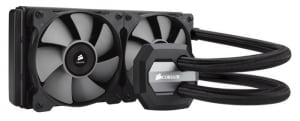
If you want a quiet system then the only way to go is water cooling. Plus it looks cool. End of.
The Corsair Hydro H80i V2 cooler with dual SP120L fans is what we want to have.
Damn it, Scotty, we need more RAM!
ECC, Registered DDR4 RAM is what goes with Xeon’s. No flashing LED’s or swanky colours, instead you get fast, reliable RAM in huge quantities. We’ll have 128GB, please.

We mean this type of Ram not the sheep kind!
What's the point if you don't get the Graphics right?
Now we could go down the ‘Professional’ route here and get something like a 24GB Nvidia Quadro P6000… but for what we need it for (Rendering/Encoding and gaming) we’ll do a lot better with consumer cards. 2 of ‘em… Enter the Nvidia GTX 1080 Ti. An outrageously fast card on its own… but with two with the option for SLI gaming…. Hell yes! See here...
Power Supply Unit - I'm giving her all I've got Captain!
Again as we’re not mucking about let’s go for a decent 1000W Corsair unit here that should give us plenty of headroom.

Computer Storage
Boot/OS Drive:
Firstly, we will need to have a boot/OS drive. Here we’re going for speed. The Samsung 960 Pro 2TB M.2 PCIe blade will tick all the boxes here. 2TB of ridiculously fast solid-state loveliness. Check out these specs below and drool…
Experience next-gen performance:
The NVMe™ interface of the 960 PRO supports PCIe® Gen 3 x4 lanes for enhanced bandwidth and lower latency than SATA SSDs.
You can experience massive sequential R/W (read/write) speeds up to 3,500/2,100 MB/s and random R/W speeds up to 440/360K IOPS, respectively*. This superb performance is enabled by an optimised package design.
Break storage limits:
Samsung provides advanced end-to-end integration, fine-tuning each component for optimal results. Individual chips are optimised to pack more in a package to maximise capacity. The 960 PRO enables you to store up to 2TB, which is unprecedented for NVMe SSDs.
Bank on solid reliability:
The 960 PRO boasts 1.2 PBW* for the 2TB model. For further reliability, DTG (Dynamic Thermal Guard) monitors and adjusts the temperature of the SSD, protecting data and achieving optimal responsiveness. Plus, the 960 PRO is backed by a 5-year limited warranty**.
Manage your drive like magic:
With the newly upgraded Magician advanced software solution, you can manage, monitor and maintain your 960 PRO like an IT professional.
Magician provides personalised firmware checking and additional functions tailored for individual user's drives. It even updates the firmware automatically to make sure that the drive's performance stays up to date.
Project Drive:
Secondly, we will want to have ample storage. This rather depends on your usage. As we’ll be editing, rendering, encoding etc... we’ll want a very fast external RAID that will give us plenty of space on our project drive.
I think this G-Technology GSPEED Shuttle XL with 24TB capacity will do nicely:
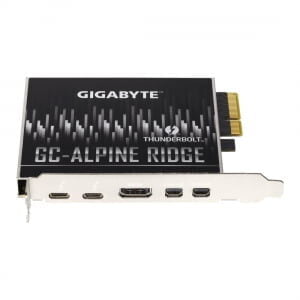
With 8 bays (including 2 EV Series bay adapters) you will get serious capacity and speed. Capacities range from 18TB to 60TB. Plenty. Don’t forget you will need a Thunderbolt card.
With all that material you will need a backup drive too!
Something similar but not as fast - The GSPEED Studio should do. Again with 24TB to match the project drive. If you think that’s overkill, you could RAID a load of internal SATA disks.
This will also require the above mentioned Thunderbolt card.
The 8TB Hitachi He8 (Helium drive) would work well. Four of those in RAID 5 would cover the 24TB with some redundancy and cost around £1K less than the GSPEED studio.
Might as well use all that space in our monolithic case eh?!
PCIe Expansion
I won’t go into too much detail here as there are so many configurations depending on what you need your system for. Essentially though as mentioned before, we’ll need a Thunderbolt card for the project drive.
Fast WIFI cards/Ethernet cards could go in here… Sound cards... Anything you want really!
As we’ll be editing let’s stick a Blackmagic Design Decklink 4K Extreme 12G in here too.
Optical Drives
As much as I’d like to NOT have one of these ancient devices, occasionally people may ask for things on DVD or BluRay. To keep these dinosaurs happy you should get a BluRay/DVD writer combo drive.
An LG re-writer should be fine!
Which Operating System should you choose?
Go for Windows 10 Pro 64-bit, unless there’a reason to have an older OS such as legacy hardware etc…
Dazzling Displays
As this will be your visual interface for this magnificent creation… let’s not skimp eh? How about a 34” curved G-Sync monitor… Mmmmm… Yes, please. Done!

The Peripherals
You’ll need a mouse and keyboard of course… You may want to get an edit specific keyboard from Logitech for Adobe Premiere, Avid or Pro Tools if you’re a musician… depends on what you use.
There is a raft of excellent mice for gaming that works very well in an editing capacity… One such is the Razer Mamba at £130.
Its expensive but you can programme all the buttons which will come in very handy for shortcuts etc…
Also in the same league is the excellent Corsair Vengeance K70 programmable gaming keyboard. Apparently used by one of the assistant editors on the new Star Wars movie. They also make some pretty sweet mice.

Conclusion - Yes there is, in fact, an ending...
Well, that’s it!! We’ve made one serious machine. At probably £15,000 it should last you a while. Hey, and if the Apocalypse does come to pass, those Xeon processors will still be chugging away - assuming you have a medium-sized nuclear reactor to run it.
There are some nice little extras that will help keep you drooling as you gaze through the gigantic window into your dazzling creation.
Some discreetly placed LED lights and coloured braided cables will smarten the whole appearance up to no end!
Try and get your graphics cards water-cooled… Overclock them too whilst you’re at it! They'll be quieter and more powerful! A no brainer.
Summary / Computer Shopping List
So let’s quickly consolidate what we have created here:
Case - Corsair Obsidian 900D, Black, Aluminium/Steel, 252x692x650 (WxHxD in mm)
Motherboard - Asus Z10PE-D8 WS, Intel C612 chipset, 8 x DDR4, 8 x SATA III 6Gb/s
CPU - Intel Xeon E5-2687W v4, Broadwell, 12 Core, 3GHz, 3.5GHz Turbo, 30MB cache
CPU Cooler - Corsair Hydro H80i V2 cooler with dual SP120L fans [Two CPUs]
Memory - Crucial/Samsung DDR4, up to 2133MHz, ECC, Registered, 1.2V, 128GB (8 x 16GB)
Power Supply - 1000W Corsair HXi, Modular, Silent, 80PLUS Platinum
Graphics - 2X 11GB NVIDIA GTX 1080 Ti, 1480MHz GPU, 3584 Cores, 11000MHz GDDR5X
Storage
OS Drive - 2TB Samsung 960 Pro, NVMe, up to 3500MB/s Read, 2100MB/s Write, 440K IOPS
External - G-Technology GSPEED Shuttle XL with 24TB capacity
Backup - 4X 8TB Hitachi He8 (Helium drive) Internal Drives in RAID 5 configuration
PICe Expansion Cards
Blackmagic Design Decklink 4K Extreme 12G
Gigabyte GC Alpine Ridge AIC Thunderbolt 3
Optical Drive - LG 16x Blu-ray Writer, 16x DVD±R, 8x +RW, 6x -RW, 12x RAM
Display - Asus PG348Q 34" 100Hz G-Sync Curved Monitor With IPS Panel
Peripherals
Razor Mamba Gaming Mouse
Corsair Vengeance K70 programmable gaming keyboard
Follow these ingredients and you will have a beast of a computer to play with! Although lengthy, and well done if you are reading this, it will help you get an idea of what you need to know when undertaking the task of creating a custom-built machine.
We hope you’ve found this blog helpful! Let us know what you think in the comments, tell us if we’ve missed something out. If you enjoyed this blog don’t forget to follow us on Twitter, Facebook and Instagram for your daily dose of media, music, production & drone chat!
Visit our website lamedia.co.uk and if you have any questions, e-mail us at [email protected] or give us a call on 0131 622 0220
In this blog, we will walk you through the steps and considerations you need to have before you dive in and get your first studio monitor. This blog is part of a series created by our Senior Editor Michael Jameson. So far we have looked at the essential kit you will need to start making your own music. We've covered picking the right computer and how to chose the perfect headphones. Now we will do our best to help you find the studio monitor that meets your needs and your budget and you get you another step closer to completing your kit!
There are four main considerations:
1. What's your budget?
2. Do you want a near field or a far field?
3. Should you go for passive or active studio monitors?
and finally, after you've got them...
4. Where should you place your speaker to maximize its effect?
First things first, what is it exactly?
What is a Studio Monitor? No, it’s not the thing you stare at all day (Unless you have one of these… see below, in which case we wouldn’t blame you…).
Studio Monitors are the conduit through which you listen to and mix your epic masterpieces. They are like choosing a new pair of ears. Quite important then eh?
Whether you are recording, mixing, or mastering, your monitors are your primary and most important point of reference.
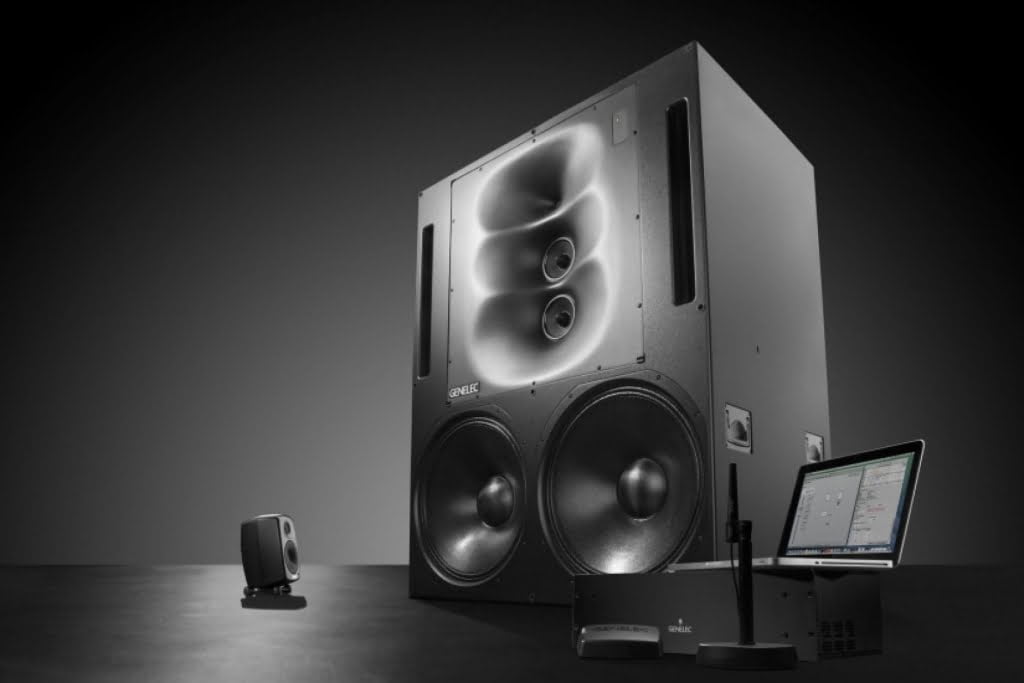
Genelec SAM™ Master Studio Monitors
What you're looking for in Studio Monitor
Good studio monitors should let you hear exactly what’s been recorded. In other words, monitors need to demonstrate a relatively flat frequency curve, instead of boosting certain frequencies to make music sound more pleasing to the ear.
They should also be rugged enough to withstand the demands of the project studio—providing an accurate, uncolored response at a wide range of volume levels.
Here are some basics you’ll need in order to get started on your quest to find your new ears.

Event 20/20BAS Studio Monitor
Budgets to suit everyone!
Well, they come in all shapes and sizes. Literally…
Thankfully, you don’t need to spend £10,000 per speaker. Good monitors such as the KRK Rokit RP5 G3’s can be picked up for as little £140 each.. although we'd recommend going for the slightly larger RP6’s as they don’t cost much more.
For something a little higher up the ladder, these Event 20/20BAS Monitors are very good.
They’ll cost you a bit more - not much past the £200 mark per speaker, but they’ll definitely be worth the extra investment. These are a reissue of an old classic, the Event 20/20BAS is based on the original Event 20/20bas released back in 1995.
According to the Event website - “The very first pair of 20/20bas speakers were used by Francis Buckley to mix Quincy Jones’ Q’s Jook Joint album for which he won the 1996 Grammy Award for Best Engineered Album.” - so they work well then.
For the home studio, the next and probably highest step I’d go to for near field monitors would be to around the £500 mark per speaker. A fantastic example in this bracket would be the Genelec 8030BPM. Costing almost exactly £500 per monitor, you’ll be very pushed to find a better near-field monitor in my opinion. Generic is well known for high-end studio monitors and these certainly don’t disappoint.
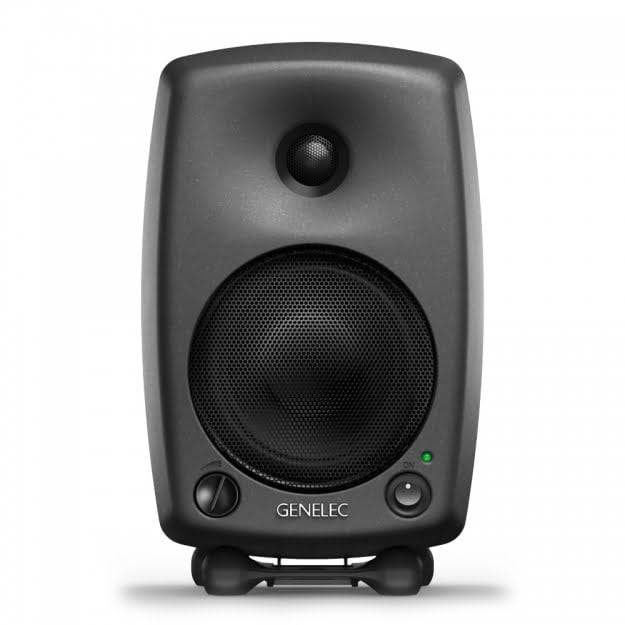
Genelec 8030BPM Studio Monitor
If you’re feeling extra flush, you could match them with a Genelec subwoofer to get those extra lows… Either the 7060BPM or the older 7050B would be ideal here.
Near Field vs Far Field
What the difference? Well, far-field monitors are designed to be more than 6 feet away from the listener. These are what you’ll find in larger acoustically treated studios. So not for us then eh!
Near-field are where we want to be. Meant for listening within 6 feet, these are the mainstay of home studios - Simples?
Passive vs Active
Ultimately we want Active speakers here. Passive monitors are powered externally and generally require more grief setting up. With cabling, choosing the right Amp (with the right power) and speakers to match, you are better going down the Active route as they have built-in, matched amplifiers.
Speaker placement
This is key. Every room will sound different.
For this most important section, we turned to Avid (the people behind Pro Tools and M-Audio) to get their thoughts on Studio Monitor placement.
“Strategic monitor placement is one of the most important factors in getting your sound right—and it’s simpler than you might think. Proper placement means choosing the best possible arrangement for your desk, speakers, and other studio equipment." - Avid
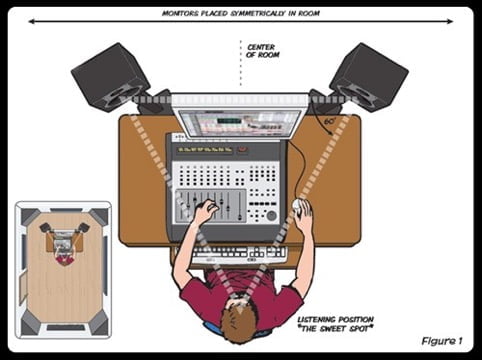
Image by Avid
When it comes to monitor placement, you’ve probably heard a lot of talk about the “sweet spot.” This refers to sitting in the middle position between the two speakers, where the stereo image is optimised.
The sweet spot lets you hear a true representation of the music so you can make accurate judgments while recording and mixing.
When positioning your monitors, observe the following guidelines to maximise the sweet spot and enjoy better performance from your monitoring setup.
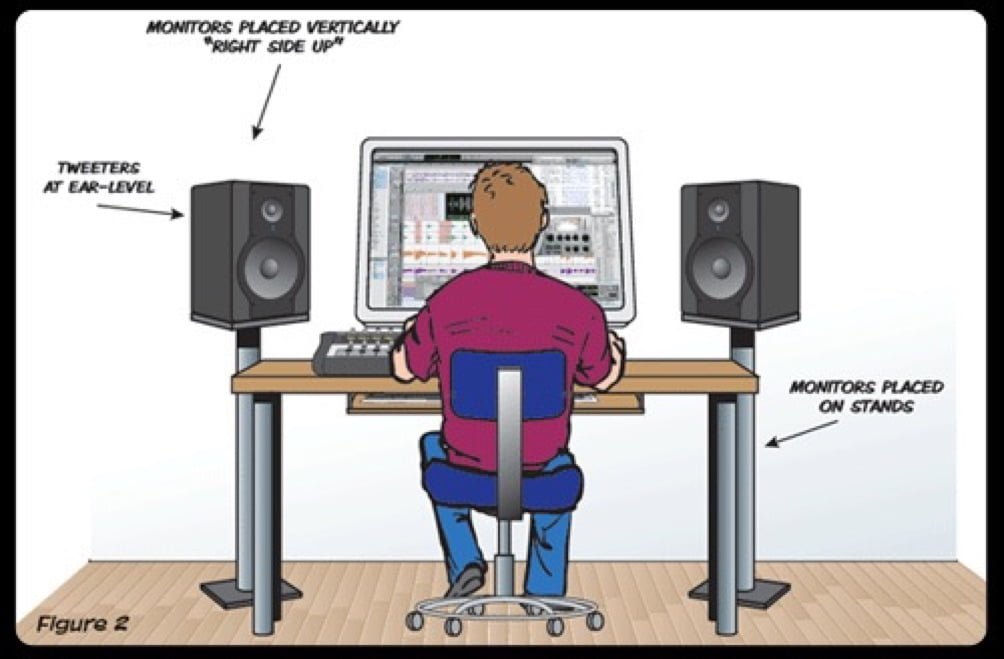
Image by Avid
Align your speakers in an equilateral triangle from the listening position
When mixing, it’s important to sit as close as possible to the centre of the sweet spot. Select a comfortable seating position and angle each monitor to accurately face that position. The “toe-in” angle of each speaker should be carefully arranged in an equilateral triangle to the listener.
Place monitors symmetrically within the room
Try to achieve symmetry in the room when setting up monitors. For example, if the left speaker is three feet from the back wall and four feet from the sidewall, place the right speaker the same way (if possible) in order to give each speaker a similar acoustic environment.
By entering the listening position along a wall, your system will maintain better low-frequency clarity. In a rectangular room, the best sound can be obtained by orienting the console and loudspeakers into the room’s long dimension. This gives the low-frequency waves enough time to develop before hitting the rear wall (see figure 1).
Distance from the back wall should be different than distance from sidewall
It’s always better to place the monitor a different distance from the back wall than from the sidewall. In other words, if your monitors are two feet from the back wall, make sure they’re not also two feet from the side walls.
When positioning your monitors, observe the following guidelines to maximise the sweet spot and enjoy better performance from your monitoring setup.

Image by Avid
Place monitors vertically (or “right-side” up)
Although it may be tempting to place your monitors on their sides, this can significantly degrade the stereo image. Place the monitors vertically to get the best stereo representation (see figure 2).
Use monitor stands whenever possible
When you place speakers on a mixing console or desk, sound waves bounce off the flat surface before reaching your ears—degrading the tonal balance, clarity and image localisation. Placing monitors on stands will prevent early reflections from interfering with your mix. (However, if this isn’t practical, it’s generally acceptable to carefully position your speakers on the desk or mixing surface.)
Tweeters should be at ear level
It’s important to place the monitors so the tweeters are at the same height as your ears (see figure 2).
Avoid placing monitors in corners
This helps prevent bass buildups that occur naturally at boundary and corner locations.
Place monitors at least 8-12” from the wall
This prevents sound waves from bouncing off the wall and reflecting back towards you (see figure 3). When using monitors that contain bass reflex ports, make sure there is enough space to prevent airflow obstructions.
Whether you’re a seasoned pro or just starting out, monitors are an important part of your studio setup and can make or break the quality of your mixes.
If you enjoyed this blog don’t forget to follow us on Twitter, Facebook, and Instagram for your daily dose of media, music, production & drone chat!
Visit our website lamedia.co.uk and if you have any questions, e-mail us at [email protected] or give us a call on 0131 622 0220